Foam clay is an air-dry modelling material filled with tiny lightweight beads. It dries to a firm, springy, closed-cell foam rather than a hard brittle shell, which makes it the standard filler and sculpting material for cosplay armour, props and large costume pieces.
From the studio: I ruined a pauldron by rushing a 15 mm layer in one go. The outside skinned over in an hour and the inside was still soft a week later, and it dented under a thumb every time I picked it up. Three thin layers over three days would have been faster in the end.
It behaves differently enough from ordinary air-dry clay that the usual habits do not transfer.
What it is good at
- Filling gaps between EVA foam pieces, so seams disappear.
- Sculpting detail onto a foam base — ornament, scrollwork, gems, texture.
- Building lightweight volume. A helmet crest in foam clay weighs almost nothing.
- Taking a smooth finish with far less work than filler and sanding.
What it is not good at is structural work. It is a surface and detail material, and it needs something underneath.
Preparing the base
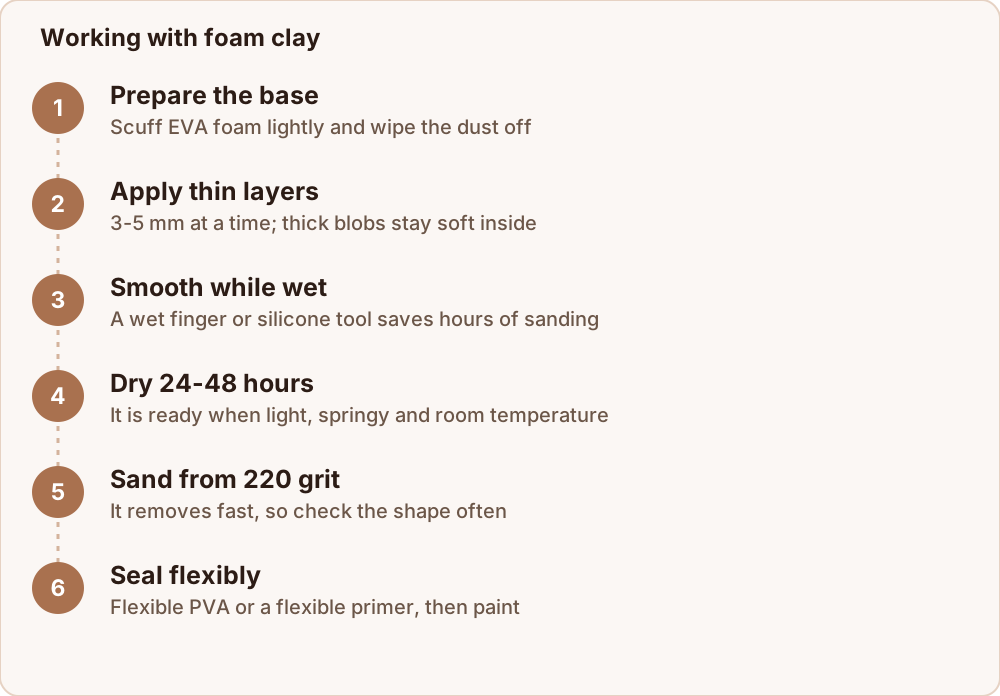
Foam clay grips clean, slightly textured surfaces. On EVA foam, scuff the area lightly with sandpaper and wipe off the dust. On smooth plastic or already-sealed surfaces, apply a thin layer of contact adhesive or PVA and let it go tacky first.
Do not apply it over an unsealed surface that will off-gas or flex heavily, and do not expect it to bridge a gap wider than a few millimetres without support.
Applying it
Work in thin layers. 3 to 5 mm at a time. A thick blob dries with a hard skin over a soft, spongy core that never firms up properly and dents under a thumb weeks later.
Wet your fingers and tools. Foam clay is sticky, and water is the release agent. A bowl of water beside you and a damp fingertip does most of the smoothing.
Smooth it as you go. A wet silicone shaper, the back of a spoon or a damp finger gives a surface that needs almost no sanding. Time spent smoothing while it is wet is time saved sanding later.
Work quickly on exposed clay. It starts skinning within about 15 to 30 minutes, and once a skin has formed, blending a new addition into it is difficult. Keep the packet closed and take out only what you need.
Build proud of the final shape. It shrinks a few percent as it dries and can pull back from sharp corners. Add a little extra and sand it down.
Drying
24 to 48 hours per layer, at room temperature. Thicker layers take longer, and a piece in a cold or humid room can take three days.
It is dry when it is light, springy and room temperature to the touch. Damp foam clay feels cool and dense. Press a fingernail into an inconspicuous area: dry foam clay resists and springs back, wet foam clay dents.
Do not force it with a heat gun or a hairdryer. As with any air-dry material, heating the surface while the core is wet produces cracks and a hard shell over a soft middle.
Sanding and shaping
Once fully dry, foam clay sands beautifully — far more easily than most fillers.
- Start at 220 grit for shaping, then 320 to 400 for smoothing.
- It removes fast, so check the form often and stop earlier than you think.
- It carves too, with a sharp craft knife, which is often faster than sanding for cutting a crisp edge.
- Small imperfections can be filled with a thin skim of fresh foam clay, dried and sanded again.
Wear a mask. The dust is fine and light and stays airborne for a long time.
Sealing and painting
Dry foam clay is porous and slightly flexible, so it needs a flexible sealer before paint, or the paint will crack the first time the piece bends.
The standard approach is two to three thin coats of flexible PVA, wood glue thinned with water, or a plastic-dip style flexible primer, letting each dry fully. Then prime and paint as normal with acrylics.
Rigid sealers and hard primers look fine until the piece flexes, at which point they craze. On armour that moves with the body, flexibility matters more than hardness.
Storage
Air is the enemy. Reseal the packet with the air pressed out, then put it in an airtight container. A small damp sponge in the box, not touching the clay, keeps the air humid and extends the life considerably.
If it has stiffened slightly, knead in a few drops of water. If it has dried into a solid lump, it is finished — unlike ordinary clay, the foam beads do not slake back down usefully.
Making your own
Homemade versions blend PVA glue with fine polystyrene beads or micro-balloons until the mixture holds together. They work, they are noticeably coarser than the commercial product, and the bead size largely determines how smooth a finish you can reach. For large filling jobs where a fine surface does not matter, it is a substantial saving.
Where to go next
Foam clay is an air-dry material, so why air-dry clay cracks explains the drying physics that applies to it too. For storing what you do not use, see how to store air-dry clay. And if you are choosing between materials for a prop, what clay is best for sculpting.
