
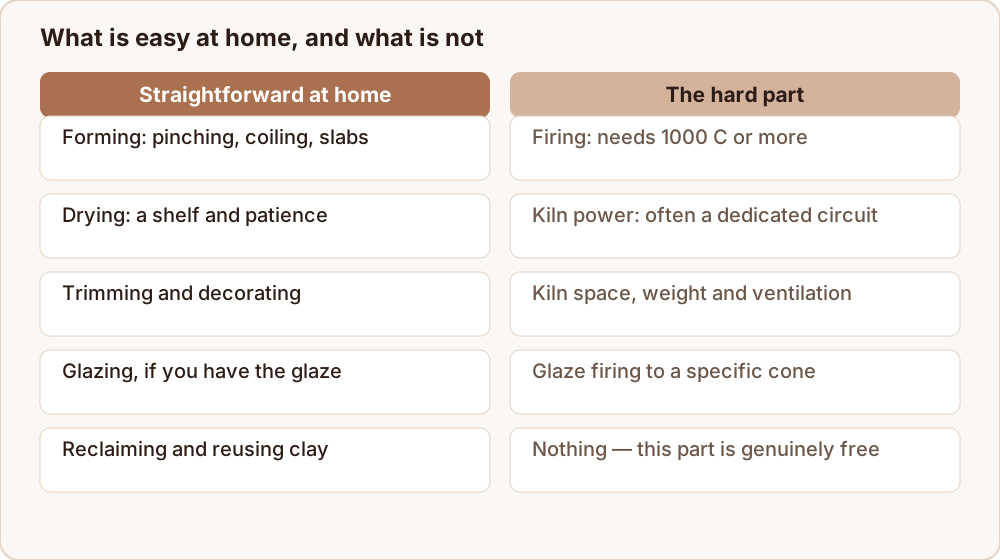
Yes — with one honest caveat. Everything up to the firing is genuinely easy to do at home with almost no equipment. The firing is the part that needs a machine you probably do not own.
That is the whole answer, and the rest of this post is about what each half actually involves.
From the studio: I made pottery on a kitchen table for a year before I ever touched a kiln. I built pots in the evening, dried them on a shelf above the radiator (badly, at first), and carried a box of bone dry work to a studio once a month to be fired. It cost me less than a gym membership and taught me more than any single piece of equipment I have bought since.
What you can absolutely do at home
Forming. Pinching, coiling and slab building need a table, clay, water and your hands. That is not a compromise — it is how most pottery in history was made, and how to make a clay pot walks through it end to end.
Drying. A shelf, a wire rack or a piece of drywall, and some patience. The technique matters more than the equipment, and drying pots evenly covers it.
Decorating. Carving, stamping, texturing and slip decoration all happen at leather-hard, at your table.
Reclaiming. Every scrap of clay can be slaked in a bucket and dried back to usable stiffness. This costs nothing at all.
Glazing, if you have glaze and somewhere to work. It is messy rather than difficult.
The kiln question
Clay becomes ceramic somewhere above 1000 °C. Below that, it is dried mud that dissolves in water. A domestic oven tops out around 250 °C, a barbecue does not come close, and no amount of time at a low temperature substitutes for the temperature itself.
So the real question is not whether you can make pottery at home. It is how you get your work fired.
Option 1: Pay a studio (start here)
Community studios, art centres and many independent potters will fire work for a fee, often charged by volume or by piece. For anyone starting out, this is by a distance the best answer: you get a properly controlled kiln, a glaze range that has already been tested, and someone to ask when something goes wrong.
Two things to check before you buy any clay:
- Which cone do they fire to? Your clay and glaze must match it.
- Will they fire clay they did not sell you? Many will not, because an unknown body can melt onto their shelves.
Option 2: Buy a small kiln
A used top-loading electric kiln is often surprisingly cheap, because moving one is a serious job. Before buying, check three things:
- The electrical supply. Many need a dedicated high-current circuit and an electrician to install it. Small test kilns run from a standard socket.
- The elements and bricks. Elements are consumable and bricks crumble.
- Where it will live. A kiln needs clearance from walls, a non-combustible floor, and real ventilation. A spare room with a window is not automatically adequate.
Option 3: Fire without a kiln
Pit firing and barrel firing genuinely work and produce beautiful smoke-marked surfaces, but they reach only 600 to 900 °C. The results are porous, unglazed and decorative rather than functional. Firing clay without a kiln covers the methods and their honest limits.
Option 4: Use a material that needs no firing
Air-dry clay and polymer clay both harden without a kiln. Neither becomes ceramic, and neither is watertight or food safe, but for decorative work they are perfectly good. Is modeling clay the same as polymer clay sets out what each can do.
A realistic home setup
If you want to work at home regularly, this is roughly the order to buy things in:
- Clay — one 12 kg box.
- A wire cutter, a needle tool and a rubber rib — together they cost very little.
- A wedging surface — a plaster bat, a hardwood board, or a slab of concrete.
- Shelving to dry on — a wire rack and a couple of pieces of drywall.
- Buckets — one for reclaim, one for slip, one for washing hands. Never wash clay down a household drain; it settles and blocks the trap.
- Later, a wheel — only once you know you want to throw.
The two health points worth taking seriously
Silica dust. Dry clay dust is genuinely harmful to lungs over long exposure. Never sweep a pottery space dry, never sand dry clay indoors, and wipe surfaces down wet.
Drains. Clay sets like concrete in a trap. Use a bucket, let the clay settle, pour off the clear water, and put the sludge in your reclaim.
Neither of these makes home pottery dangerous. Both are worth building a habit around from day one.
A first month that works
If you want a concrete plan rather than a list of options, this is the sequence I would give anyone starting from nothing.
Week 1. Buy one box of mid-fire stoneware and find a studio that fires for the public. Ask which cone they fire and whether they accept outside clay before you buy anything.
Week 2. Make five pinch pots. Not one careful pot — five quick ones. You are learning wall thickness and compression, and repetition teaches that far faster than care does.
Week 3. Make something coiled and larger, and attach a handle to something. The handle will teach you more about moisture matching than any article can.
Week 4. Dry everything properly, take it to the studio for bisque firing, then glaze it there using their tested glazes.
By the end you will have made real pottery, learned where your pieces fail, and spent very little. Only then is it worth thinking about a wheel or a kiln — and you will know which one you actually want.
Where to go next
To make your first piece, follow how to make a clay pot or start smaller with the pinch pot guide. To buy the right material, see where to buy clay for pottery. And firing clay without a kiln covers the options if a studio is not within reach.
