Every clay skill you will ever need is present in a pinch pot: making walls an even thickness, compressing surfaces so they do not crack, and drying at the right speed. No wheel, no tools, no kiln required to practise. If you are new to clay, make five of these before you do anything else.
From the studio: My first five pinch pots all cracked at the rim, and I was convinced I was pinching too hard. I was not — I was leaving the rim thinner than the wall, so it dried first and tore. Ten seconds with a wet fingertip round the rim of pot number six, and that was the end of it.
Making one
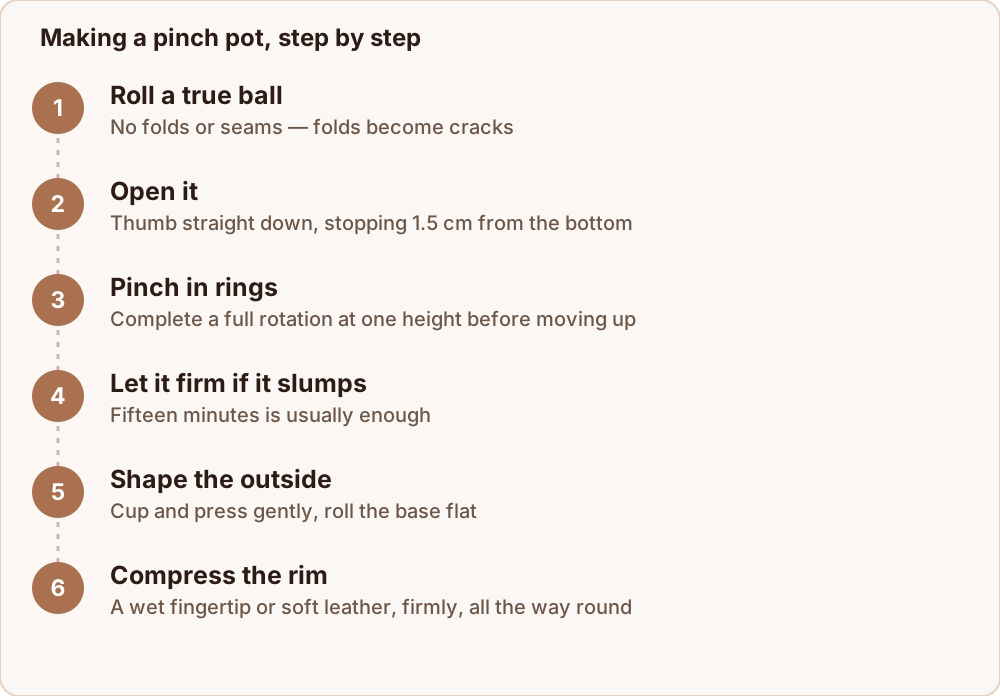
Start with a well-shaped ball. Roll it between your palms until it is genuinely round with no folds or seams. Folds become cracks.
Open it. Hold the ball in one cupped hand and press your thumb straight into the centre until about 1.5 cm from the bottom. Do not go through. Use your other thumb as a depth gauge on the outside if you are not sure.
Pinch from the bottom up. Thumb inside, fingers outside, squeeze gently and rotate the pot a small step. Work in rings: complete a full rotation at one height, move up, do another. Squeezing randomly makes a lumpy wall — the discipline of rings is the whole technique.
Keep the pressure light and the rotations many. Twenty gentle rotations beat five hard ones. Hard pinching thins one spot, and you cannot put clay back.
Let it firm up if it slumps. If the walls start to sag outward, set it down for fifteen minutes. Clay stiffens as it loses water and will hold a shape it could not hold when soft.
Shape the outside. Once the walls are close to final thickness, refine the profile by cupping the pot and pressing gently, or by rolling the base on the table to flatten it.
Compress the rim last. Run a wet fingertip or a small piece of soft leather around it firmly. This closes the torn particles at the edge, which is the single most common cracking point.
Aim for 8 mm
Thick pots feel dead in the hand and dry unevenly. Very thin pots crack and warp. Around 8 mm — a bit thicker than a pound coin's diameter — is a good target for a first pot, and consistency matters more than the number. Check by pinching the wall between thumb and finger at several heights. If the top is 5 mm and the base is 15 mm, the base is where your work is.
The three mistakes
A thick base. Almost everyone leaves too much clay at the bottom. The base takes twice as long to dry as the walls, shrinks late, and cracks. If yours is thick, press your thumb down into the interior floor and work it outward.
Working too fast. Clay from your hands loses water surprisingly quickly. If your pot goes from soft to stiff in ten minutes, your hands are warm and dry — work faster, or re-wet slightly. If it stays soggy and slumps, your clay was too wet to begin with.
Drying it in the open. Once finished, cover the pot loosely with plastic for a day so the rim does not race ahead of the base. Then uncover, set it on a wire rack or an upturned yoghurt lid, and let it go to bone dry over two or three days.
How long each stage takes
One of the hardest things to judge at the start is how long to wait, so here are realistic timings for a cup-sized pinch pot in an ordinary room.
| Stage | Time | How you know |
|---|---|---|
| Building | 20–40 minutes | The wall is even and the rim is compressed |
| Firming to leather-hard | 1–3 hours | Holds its shape, cool to the touch, cuts cleanly |
| Adding a foot or texture | at leather-hard | A fingernail marks it without sinking in |
| Tented under plastic | 24 hours | The whole pot is one uniform colour |
| Open drying to bone dry | 2–4 days | Room temperature against your cheek, pale and chalky |
| Bisque firing and cooling | 1–2 days | The kiln is below 100 °C before opening |
The timings stretch in a cold or humid room and shorten in a warm dry one, which is why every instruction here is written as a condition to check rather than a fixed number. A pot in a heated kitchen in winter can go from soft to leather-hard in under an hour, and the same pot in an unheated garage might take a full day.
If you need to pause part way through, wrap the pot in plastic. Clay left half-finished in open air becomes a two-moisture object, and that is the state that cracks.
Where to go next
Two pinch pots make a sphere. Make two hemispheres of the same size, let them firm to leather-hard, score and slip the rims, press them together, and blend the seam. You now have a hollow closed form — the basis of rattles, bud vases and most sculptural work. Pierce it before it dries, or trapped air will expand in the kiln.
Add a foot. Roll a coil, score and slip it onto the base at leather-hard, and blend it in. A foot lifts the pot visually and gives the base a path for even drying.
Texture it. Leather-hard pinch pots take stamps, carving, and slip decoration beautifully, and the slightly irregular surface of a hand-pinched wall makes texture read better than it does on a machine-even one.
