Small figures are the most popular thing people make from clay and the most likely to fail — usually in one of three ways: they topple, they crack while drying, or a limb falls off a week later. All three have straightforward fixes.
From the studio: I once fired a small figure with a wire armature still inside it, on the theory that a thin wire could not do much harm. It expanded more than the clay did and split the figure from the inside. That is a mistake you make exactly once.
Choose the material first
Polymer clay for small keepable figures with fine detail. Hardens in a domestic oven, holds detail beautifully, and needs a foil armature above a few centimetres.
Air-dry clay for cheap practice and larger decorative figures. Weak, so keep projections short and thick.
Ceramic clay for figures that will be fired. Use a grogged sculpture body, and no wire armature — wire does not burn out, it expands more than clay when heated, and it cracks the piece apart in the kiln. Support ceramic figures externally while you work, or build them hollow.
Start with the big shapes
The order matters more than the tools:
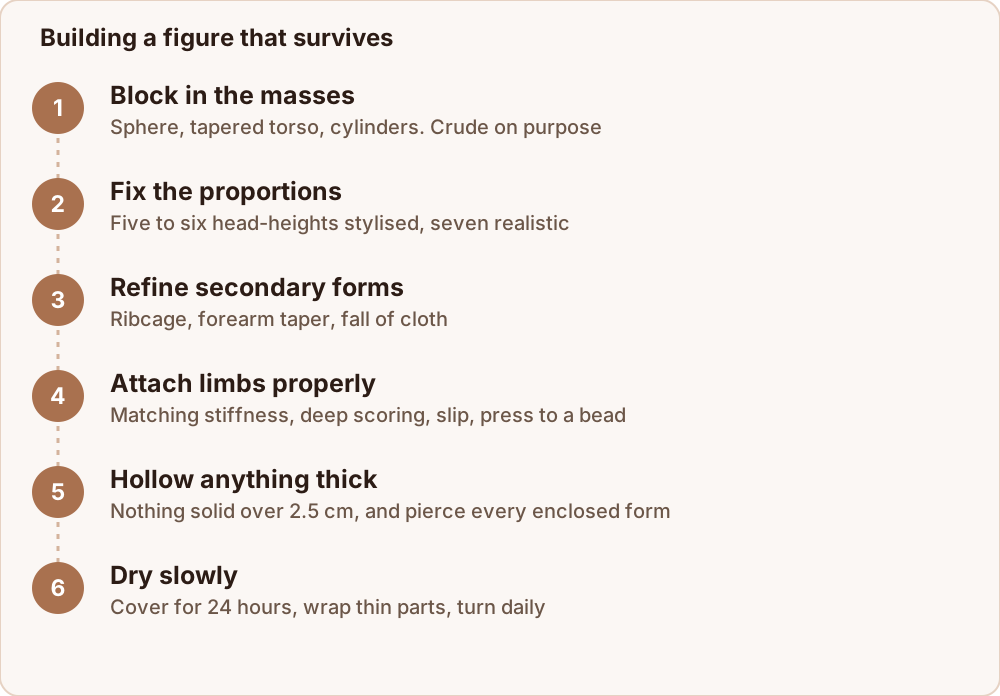
- Block in the masses. A sphere for the head, a tapered form for the torso, cylinders for limbs. Assemble the figure from these crude shapes and look at it.
- Fix the proportions now. As a rough guide, a stylised figure reads well at five to six head-heights; a realistic adult is seven to seven and a half. Check the silhouette from the front, side and back before you refine anything.
- Refine secondary forms — the wedge of the ribcage, the taper of a forearm, the fall of a garment.
- Detail last. Faces, fingers, texture, surface pattern.
The universal beginner mistake is detailing a face on a head that is the wrong shape and the wrong size. That work is lost as soon as you fix the underlying form, so save it for last.
Keep it standing
Small figures topple because the mass sits too high over a narrow base.
- Widen the base. Feet on a slab, a rock, a plinth. A base is not a cop-out; it is normal sculptural practice.
- Keep the weight low. Big heads and outstretched arms move the centre of gravity up and out. Bulk out the lower half.
- Support it while you work. A blob of scrap clay under an outstretched arm, or a wire prop for a polymer piece, holds the pose until it firms up.
- Test it early, before you have committed hours to the surface.
Attaching limbs so they stay attached
For ceramic clay, this is the crack that ruins most figures:
- Match the stiffness. Both the limb and the body must be at the same leather-hard stage. A fresh soft arm on a firm body will shrink more as it dries and pull itself off.
- Score deeply. Crosshatch both faces about 1 mm deep with a needle tool. Scratches do nothing.
- Slip both faces with slip made from the same clay body.
- Press and wiggle until a small bead of clay squeezes out around the join, then blend that bead into both surfaces. No bead means trapped air.
- Reinforce the inside of the join with a thin coil pressed in and smoothed, if you can reach it.
For polymer clay, fresh clay bonds to fresh clay under pressure; to attach to already-baked clay, use liquid polymer clay as glue.
Hollow anything thick
Solid clay thicker than about 2.5 cm dries unevenly and, in a kiln, can trap steam and blow apart.
Three ways to avoid it:
- Build over a hollow core of crumpled newspaper or foil. Paper burns out in the firing; foil should be removed before firing where possible, though a small amount will usually survive without damage.
- Build in two halves and join them at leather-hard. Standard for heads.
- Hollow it out from underneath once the figure is leather-hard, using a loop tool, leaving walls about 1 cm thick.
Pierce every enclosed form. A sealed hollow shape contains air, and air expands in a kiln. One small hole, somewhere discreet, is enough to prevent an explosion that will also damage the pots around it.
Drying without cracks
Thin projections — arms, ears, tails, tool handles — dry far faster than the body and pull away as they shrink.
- Cover the whole figure loosely with plastic for the first 24 hours.
- Wrap thin parts individually in small strips of plastic or foil to slow them further.
- Set the figure on a wire rack or a piece of drywall so the base dries too, and turn it daily.
- Keep it away from radiators, sunlight and draughts.
Patience here costs a day and saves the piece.
Finishing
Ceramic: bisque fire, then glaze, or leave raw and finish with a wash of oxide rubbed into the texture and wiped off the high points, which reads far better on a figure than a thick glossy coat.
Polymer: cool fully, sand with wet paper from 400 to 1500 grit, then buff or seal with a polymer-compatible varnish.
Air-dry: sand when bone dry, paint with acrylics, and seal every surface including the base with two or three thin coats of acrylic varnish.
Where to go next
The attachment step is where most figures fail, so score and slip joins is worth reading in full. For the wider sculpting method, see how to sculpt with clay. And if you are working in polymer, how to sculpt with polymer clay covers armatures and staged baking.
