Polymer clay behaves nothing like ceramic clay. It never dries, so there is no leather-hard stage and no rush. It stays exactly as soft as your hands make it, which means the real constraints are gravity, thickness and heat rather than moisture.
From the studio: Baking in stages changed what I could attempt more than any tool ever did. Once the body is cured you can lean on it, press against it, and add detail without flattening what is underneath — which is impossible on a raw figure.
1. Condition every block properly
Straight from the packet, polymer clay is stiff and its particles are not evenly distributed. Conditioning fixes both, and skipping it produces sculptures that crack and snap after baking.
By hand: knead, roll into a snake, fold, and repeat for five to ten minutes until the clay is uniformly soft and stretches before it tears.
With a pasta machine: run it through on the thickest setting, fold, and pass it through again — twenty times, folding the same way each pass so you do not trap air.
You know it is conditioned when a strip stretches and thins before breaking rather than snapping cleanly.
2. Build an armature
Anything bigger than a large coin should be built over a core, for three reasons: thick clay cures unevenly, thick clay cracks, and clay is expensive.
Aluminium foil is the standard core. Crush it into the rough mass of your form, squeezing hard so it is dense — a loose core moves under your fingers while you work. Aim to leave 5 to 10 mm of clay over the surface.
Wire for limbs and anything with a thin projection. Aluminium armature wire bends easily and holds. Wrap wire with a little foil or masking tape to give the clay something to grip.
Both survive baking without issue. Do not use anything with trapped air pockets or moisture inside, since both expand in the oven.
3. Work from large to small
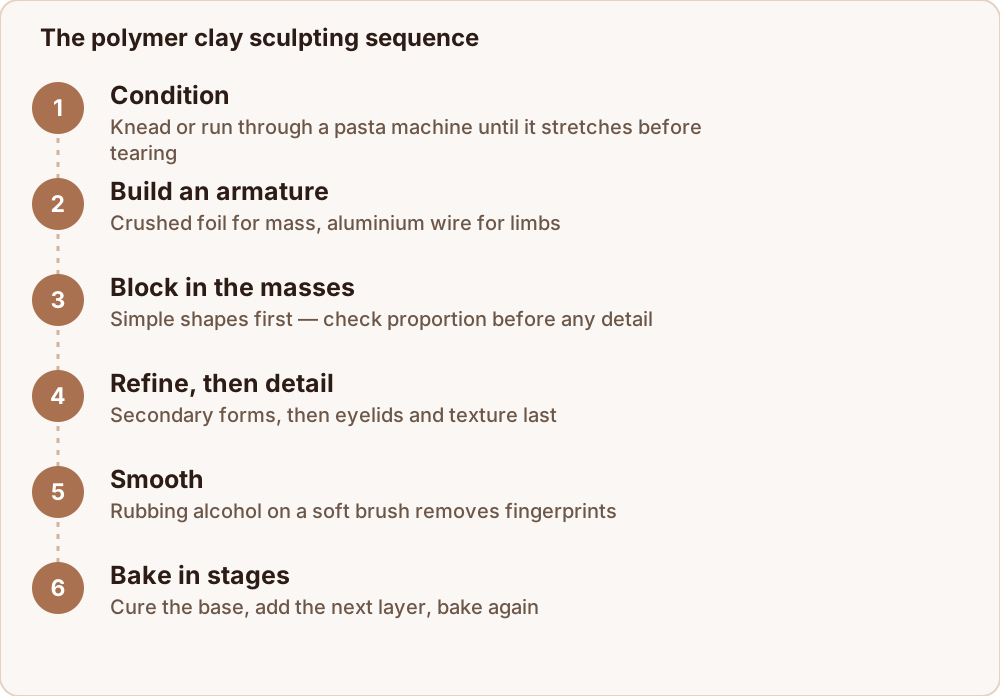
The order that produces good sculpture is always the same: the big masses first, proportions and gesture second, surface detail last.
- Block in the primary forms as simple shapes — a sphere for a head, a tapered cylinder for a torso.
- Check proportions from several angles before adding anything.
- Refine the secondary forms: brow ridges, muscle groups, folds of cloth.
- Only then add detail: eyelids, texture, fine lines.
The temptation is always to start carving eyelashes into a head that is still the wrong shape. Resist it, because you will lose the detail when you fix the underlying form.
Rest the clay if it gets too soft. Warm hands make clay sticky and unresponsive. Put the piece down for ten minutes, or in the fridge for five, and it firms up enough to take detail.
4. Join pieces properly
Fresh clay bonds to fresh clay under pressure. Press firmly and blend the seam with a tool rather than just butting the pieces together.
To attach to already-baked clay, use liquid polymer clay (bake-and-bond) as a glue. It cures into the same material and forms a genuine bond. Raw clay pressed onto cured clay without it will hold for a while and then pop off.
5. Smooth it
- Rubbing alcohol on a soft brush dissolves the very surface and removes fingerprints and tool marks. This is the single most useful smoothing trick, and it takes seconds.
- Silicone shapers push clay without leaving the fine ridges a metal tool leaves.
- Cornstarch on a brush stops tools sticking during detailing, and brushes off before baking.
- Anything still imperfect can be sanded after baking with wet sandpaper from 400 up to 1500 grit.
6. Bake it correctly
Follow the brand's temperature, which varies from about 110 °C to 150 °C, and bake for at least 30 minutes per 6 mm of thickness. Underbaking is the leading cause of brittle sculptures, and extra time at the right temperature is harmless.
Two things that prevent most baking failures:
- Use an oven thermometer. Domestic ovens swing 20 to 40 °C around the dial setting, and scorching starts near 175 °C.
- Tent the piece with foil. This blocks direct radiant heat from the element, which is what browns edges and thin points while the middle is still curing.
Support overhangs. Polymer clay softens slightly before it cures, so an outstretched arm droops. Bed the piece in polyester fibrefill, cornstarch or a nest of crumpled foil while it bakes.
7. Bake in stages for complex work
This is the technique that unlocks ambitious sculpture. Build and cure the base form, then add the next layer of detail on top of a rigid, non-deformable object and bake again. You can lean on a cured piece; you cannot lean on a raw one.
For a figure: bake the body, then add the head; bake, then add clothing folds; bake, then add fine surface detail. Each stage sits on a solid foundation.
8. Finish
Let it cool completely before judging it — hot polymer clay is flexible and disappointingly soft, and reaches full strength only when cool.
Then sand if needed, buff on a soft cloth for a natural sheen, or apply a polymer-compatible varnish. Nail polish and generic craft varnishes react with the plasticiser and can stay tacky for years.
Where to go next
The curing step has its own failure modes — see baking polymer clay without burning. For general sculpting method that applies in any material, read how to sculpt with clay. And how to store polymer clay keeps the rest of the block usable.
