Most people fail at centering because they try to overpower the clay with their arms. Clay is stronger than your arms and it spins 180 times a minute. What actually centres clay is a hand that does not move. Your job is to build a rigid structure out of your body, put it in the right place, and let the wheel do the work.
From the studio: I spent my first two months trying to muscle the clay into submission, and my forearms gave out long before the clay did. The session it clicked, I had my elbows jammed into my hips and I was almost bored — the clay just went quiet and stayed there. That is what centering feels like when you stop fighting.
Set up before you touch the clay
- Seat height: your shoulders should be above the clay so you can press down as well as in. If you are level with the wheel head, raise your seat or lower the wheel.
- Stance: knees against the splash pan or wheel frame, elbows tucked into your hips or braced on your thighs. Every joint from the wheel to your hands should be locked.
- Speed: fast. A wobble at high speed averages into a blur your hands can hold; the same wobble at low speed knocks your hands around.
- Water: enough to keep the clay slick, not enough to soften it. Re-wet whenever you feel drag.
Attach the clay properly
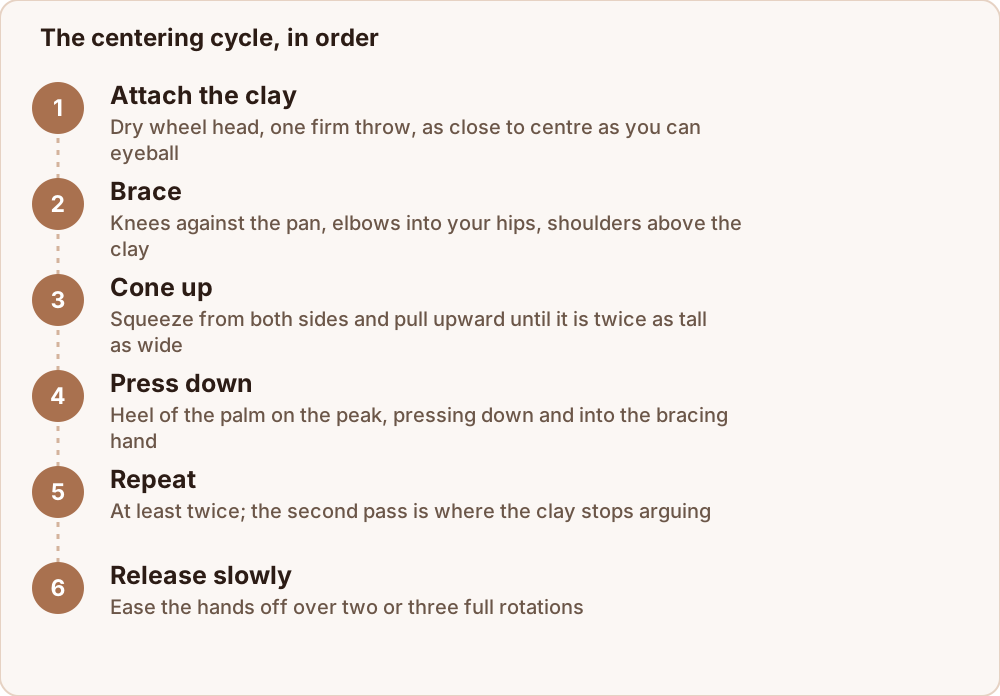
Dry the wheel head and the base of the ball. Throw the ball down hard, once, as close to the centre as you can eyeball. A ball attached off-centre by 2 cm is a fight; the same ball within 5 mm is nearly centred already. Slap the sides with a cupped hand while the wheel turns slowly to rough it in before you ever add water.
The two moves
Everything in centering is a variant of coning up and pressing down.
Coning up
With the wheel fast, squeeze from both sides with the heels of your hands, hands touching each other, and pull upward as you squeeze. The mass rises into a cone. This does two things: it homogenises the clay by dragging it through itself — which is where wedging errors get fixed — and it lets you feel where the mass wants to go.
Keep squeezing until the cone is roughly twice as tall as it is wide. Do not let it get so tall that it whips.
Pressing down
Left hand (for a counter-clockwise wheel) braces the side. Right hand goes over the top, heel of the palm on the peak, and presses down and slightly toward the left hand. The cone collapses into a low dome. The two hands are a closed system: side pressure and top pressure balancing each other.
Do this cycle at least twice. One pass is almost never enough, and the second pass is where the clay stops arguing.
The rule that fixes everything
Pressure only ever increases or holds. It never decreases suddenly.
Every off-centre lump you have ever made came from a hand that flinched. When you finish a pass, keep the pressure and slowly, over two or three full rotations, ease your hands outward and off. Slick your hands with water first so they release rather than grab.
How to know it is centred
Do not stare at the clay — your eyes will lie to you about a symmetrical wobble. Instead:
- Rest a knuckle lightly against the side. A centred mass feels like continuous contact. An off-centre one taps.
- Hold a pin or needle tool steady near the surface without touching. The gap should not change.
- Close your eyes and feel. This works better than looking, every time.
Finishing the centred mound
Before opening, flatten the top and press down firmly on it with a flat palm or rib. That compression is what prevents S-cracks in the base later. Then set the width you want: a low, wide dome for bowls, a taller narrower one for cylinders.
Common failure modes
| Symptom | Cause | Fix |
|---|---|---|
| Clay spirals off to one side | Hands drifting with the clay | Brace elbows on hips; stop chasing |
| Surface goes slimy and slips | Too much water, too long | Sponge off, work faster, use less water |
| A hard lump keeps reappearing | Uneven wedging or an air pocket | Cone up two more times to homogenise |
| Centred, then wobbles when you open | Released pressure abruptly | Ease off over several rotations |
| Arms exhausted after one ball | Muscling instead of bracing | Lock joints; use body weight, not biceps |
How long this takes
For most people, reliably centring 500 g takes somewhere between three and eight hours of wheel time. That is normal. Centre and recycle the same ball twenty times in a session rather than trying to make twenty pots — the repetition without the outcome pressure is what builds the feel.
A practice session that actually builds the skill
Most people practise centering by trying to make pots, which mixes two hard skills and teaches neither well.
A better session looks like this:
- Take one ball of about 600 g. That is all you need for an hour.
- Centre it. Then wire it off the wheel head, re-wedge it, and centre it again. No opening, no pulling, no pot.
- Do that twenty times. It sounds tedious and it is the single fastest route to a reliable centering hand.
- Close your eyes for the last five. Removing sight forces you to feel the clay instead of watching it, and almost everyone finds their hands are better judges than their eyes.
What this removes is the outcome pressure. When every ball must become a pot, a wobble feels like a failure and you tense up — which is exactly what puts the clay off centre. When the ball is going back in the bag regardless, you relax, and relaxed bracing is the whole technique.
Two or three sessions like this typically do more than a month of trying to make mugs.
Where to go next
Centering is much easier on well-prepared clay, so wedging clay properly is the post to read alongside this one. Once you are opening pots, drying pots evenly explains where most thrown work is actually lost. And if you want to practise form away from the wheel, the pinch pot teaches the same wall-thickness discipline with no equipment.
