Wild clay comes out of the ground mixed with sand, gravel, roots and organic matter. Processing means separating the fine clay particles from everything else, and it works because clay particles are so small that they stay suspended in water long after sand has sunk.
From the studio: My first wild clay test tile slumped into a puddle and glued itself to the shelf at cone 6, which is exactly why I now fire every unknown body on a scrap of broken shelf. It cost me nothing that time. It could easily have cost me a shelf.
The whole method is built on that one difference.
Step 1: Dry it out first
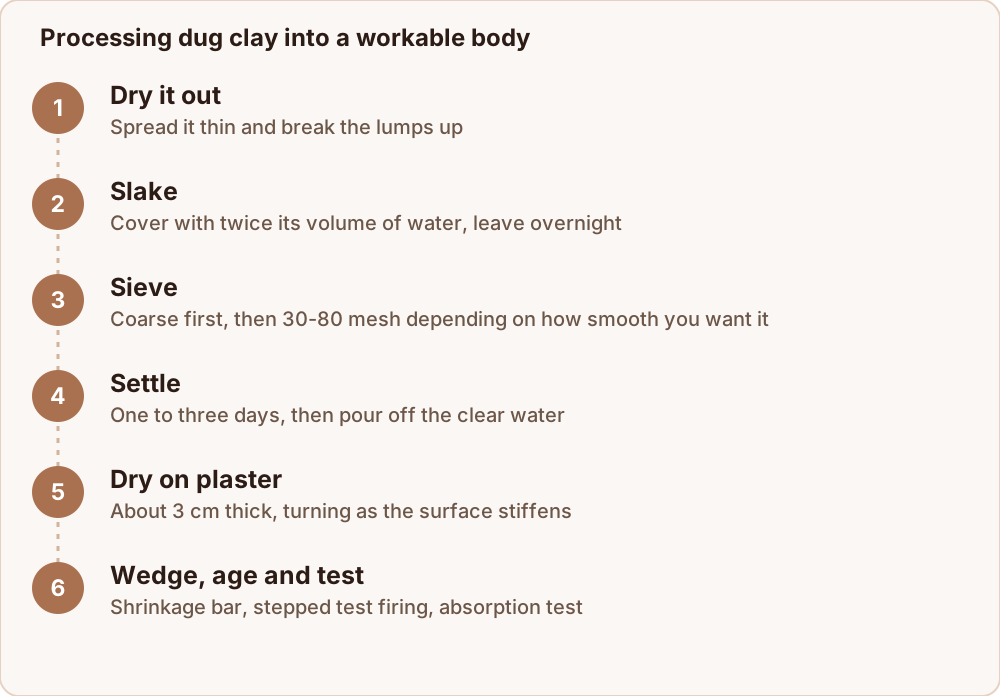
Counter-intuitive, but it saves a great deal of time. Spread the dug clay in a shallow tray and let it dry completely — a few days in the sun, or a week indoors. Break the dry lumps up with a hammer or by treading on them in a bag.
Dry clay is full of open pores, so when it hits water it collapses on its own within hours. Wet clay dropped in water stays a sullen lump for days.
Step 2: Slake it
Put the dry crumbs in a bucket and cover with plenty of water — roughly twice the volume of clay. Leave it overnight, or up to a day for big lumps. Do not stir at first; stirring early wraps wet clay around dry cores.
Come back to a bucket of sludge and stir it thoroughly into a thin slurry, thinner than you think is useful. Thin slurry sieves easily; thick slurry clogs everything.
Step 3: Sieve
Pour the slurry through a coarse kitchen sieve first to catch stones, roots and worms, then through a finer one — 30 mesh is a reasonable working screen, 60 or 80 mesh if you want a smooth body.
Push it through with your hand or a stiff brush and rinse the residue with a little water to recover the clay clinging to the grit. What stays behind in the sieve is sand and organic matter you do not want.
An alternative for very sandy material is the decant method: stir the slurry hard, wait 20 to 30 seconds for the sand to sink, then pour the still-cloudy water off the top into a second bucket. The clay is in the cloudy water; the sand is what you left behind. Repeat until the sand stops accumulating.
Step 4: Settle and pour off
Leave the sieved slurry to stand, undisturbed, for one to three days. The clay settles into a dense layer with clear water on top.
Pour or siphon off the clear water carefully. What remains is clay at far too high a water content to use, but it is now clean.
Step 5: Dry to working stiffness
Spread the slurry on a plaster bat about 3 cm thick. Plaster pulls water out steadily from below, which is exactly what you want. Alternatives that work: a bed of dry newspaper on a board, an old cotton pillowcase in a colander, or a wooden board in a warm room, all slower.
Check it every few hours. When the surface stiffens, turn the slab over so the wetter side is exposed. It is ready when a lump holds its shape, does not stick to your hands, and bends without cracking.
If it goes too far and gets crumbly, add water back and wedge. If it stays sticky, give it more time on plaster.
Step 6: Wedge and age
Wedge it thoroughly — spiral or ram's head — to make the moisture uniform and drive out air. Cut the ball with a wire and look at the cut face: it should be featureless, with no streaks or voids.
Then, if you can, age it. Bagged wet for a few weeks, wild clay becomes noticeably more plastic as bacteria break down organic matter and the particles align. Old potters' clay was aged for years. A month makes a visible difference.
Step 7: Test before you trust it
This is the part people skip and regret.
Make a shrinkage bar. Roll a slab, cut a strip, and scribe a line exactly 10 cm long. Measure it bone dry, then again after firing. Total shrinkage over about 14 percent means a body prone to cracking, and adding sand or grog will help.
Fire a stepped test. Fire small test tiles at cone 06 first. If they survive intact, fire more at cone 3, then cone 6. Stop when the tiles start to bloat, slump or stick to the shelf. Always fire unknown clay on a piece of scrap kiln shelf or a bed of sand, never directly on your good shelves.
Test absorption. Weigh a fired tile, boil it in water for two hours, cool it submerged overnight, dry the surface and weigh again. Under 3 percent gain means a body approaching vitrification; 10 percent or more means it is porous earthenware and needs a glaze to hold liquid.
Adjusting the body
- Cracks while drying, shrinks a lot — add 10 to 25 percent fine sand or grog by volume, wedged in thoroughly.
- Short and crumbly, will not bend — age it wet, or blend in 10 to 20 percent of a commercial plastic ball clay.
- Melts or bloats at low temperature — high iron or high flux content. Use it as a slip or a decorating material on a commercial body instead of building with it.
A wild clay that never becomes a good throwing body is still useful. Sieved fine and thinned, it makes a slip with a colour you cannot buy.
Where to go next
If you have not found a deposit yet, start with where to find natural clay. For the garden-scale version of this method, see how to make clay from soil. And once you have a body, wedging clay properly is the next step.
